Input Tables
Overview
Input Tables are user-modifiable database tables. Much like a spreadsheet, Input Tables are used to store user-provided data, which can then be used to drive calculations. Data in Input Tables can be added, changed, or removed instantaneously, either manually in the user interface or automatically via the Java API.
Input Tables consist of an append-only Deephaven table that contains the raw data, and the Input Table modified by the user in the console. Each time the Input Table is modified, new rows are added to the underlying live table. (If a row is removed, then an empty row is appended for that key, and the key is marked as deleted.) Queries that view the Input Table only use the last row for each key (using the lastby() function), and filter out the rows marked as deleted (using where()).
A mapping table called Tables, which is saved in the __DbConfig namespace, is a user table that the system uses to keep track of Input Tables. It must exist before any Input Tables can be created.
See: Enabling Input Tables for more information.
Note that Input Tables created by users cannot have any of the following column names as these columns already exist in the underlying table of raw data, and are dropped when the query is displayed in the console columns:
Date_Deleted-
_ChangeTime _ClientHostName_ServerHostName_WorkerName
Note: Input Tables now require use of the Remote Table Appender/Log Aggregator Service. Remote User Table Service is no longer supported.
Creating Input Tables
Before you can create Input Tables using the Deephaven query language, your system administrator should deploy the table definition and schema. Instructions can be found in the Deephaven System Administration Guide.
The query to create an Input Table requires two parts: the first creates the underlying Input Table object, and the second shows the actual table you can edit in the user interface.
The following syntax creates the InputTable object, which will not show up in the console:
itObj = InputTable.newInputTable(db, "Namespace", "TableName",
	cKey("ColName", Class)...,
	c("ColName", Class)...)
You must define your key columns when creating the Input Table. For example, a table storing different settings for each user would have one key column (e.g., Username). A table with settings for each stock ticker and stock exchange would have two key columns (e.g., Symbol and Exchange). The cKey() method is used to create create key columns and the c() method is used to will create value (non-key) columns.
Note: the available classes for column type include String, double, Boolean, byte, char, int, short, long, and float. A drop-down list of values relevant to that column can also be added to any column type using the EnumValues method. For example, c("YearOfBirth", int, new EnumValues(1990, 1991, 1992, 1993)) will generate a drop-down list of four dates in the "YearOfBirth" column.
Next, to actually access and edit the Input Table in the user interface, the following syntax is used:
it = itObj.getTable()
Examples
inputTableObj = InputTable.newInputTable(db, "InputTableTest", "MyTable",
	cKey("Symbol", String),
	cKey("Exchange", String),
	c("MyDoubleCol", double),
	c("MyBooleanCol", boolean)
   )
theTable = inputTableObj.getTable()
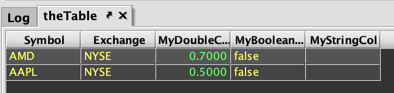
The first line of the query creates the Input Table object, MyTable, in the InputTableTest namespace, with two key columns (Symbol and Exchange) and two value columns (MyDoubleCol and MyBooleanCol). Included in the argument for each column is its name and the type of value it will contain.
The second line of the query assigns a new variable, theTable, to the Input Table object and uses the getTable method to open it in the console.
When the new Input Table, theTable, opens, there is no data yet to display, as shown below.

Opening an Input Table
To open an existing Input Table in Deephaven, use the following syntax:
theTable = InputTable.inputTable(db, "InputTableTest", "TestTable")
To get the InputTable object, use the following syntax:
inputTableObj = theTable.getAttribute("InputTable")
Add to the Input Table
There are two ways to add to the Input Table: using the add() method in the query language, or from the Table menu in the console.
Using the add() method
You can add to the Input Table by passing a table with the new rows to the InputTable.add() method. If the Input Table already has rows for any of the keys in the new table, the new rows will replace the old ones.
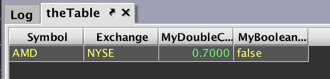
To add one row to the table, use the following syntax:
newRows = emptyTable(1).select( "Symbol=`AMD`", "Exchange=`NYSE`", "MyDoubleCol=0.7", "MyBooleanCol=false")
inputTableObj.add(newRows)
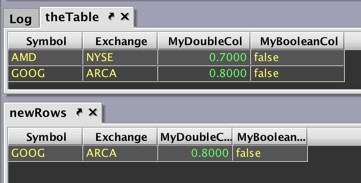
Let's say we add another new row, for the Symbol GOOG:
newRows = emptyTable(1).select("Symbol=`GOOG`", "Exchange=`ARCA`", "MyDoubleCol=0.8","MyBooleanCol=false")
inputTableObj.add(newRows)
Remember that key column values must be distinct. If we add a new row for the Symbol GOOG, on the same exchange (ARCA), the new information in the value columns will actually replace the current GOOG row:
newRows = emptyTable(1).select("Symbol=`GOOG`", "Exchange=`ARCA`", "MyDoubleCol=0.2", "MyBooleanCol=false")
inputTableObj.add(newRows)
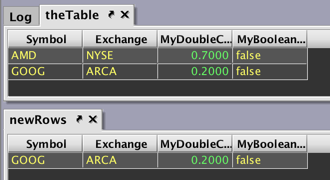
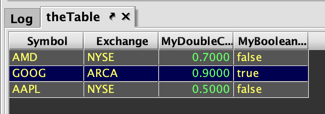
When the table loads, it still has two rows. However, the value in MyDoubleCol has changed from 0.8 to 0.2.
From the Table Menu
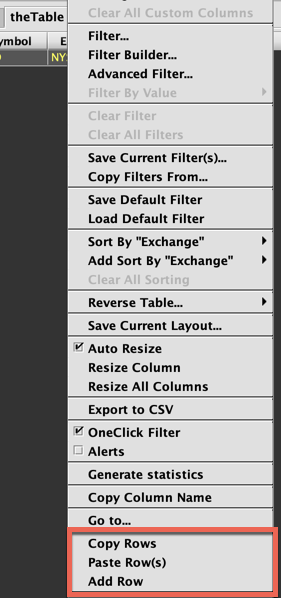
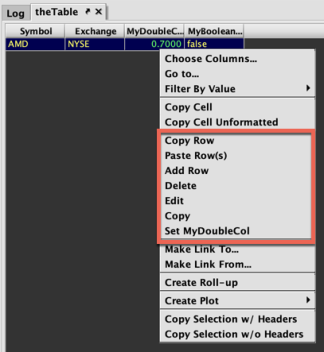
To add a row to the Input Table, right-click either the table header or the body of the table. The right-click column menu (on the left below) and the right-click table data menu (on the right below) will show Add Row. Note: if you have not added any rows to your table yet, right-click the column header.
|
Column Header Menu |
Table Data Menu |
|---|---|
|
|
|
Selecting Add Row opens a dialog window that identifies the Input Table and its namespace, and provides fields for each column in the Input Table.
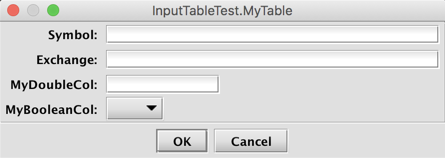
Type in the information desired for the new row:
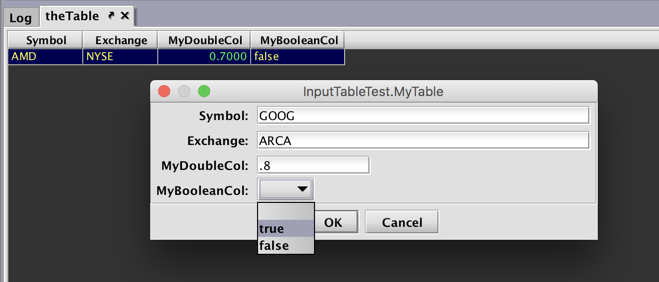
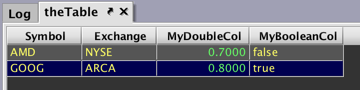
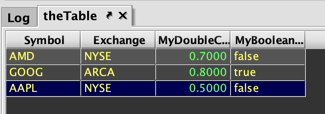
A new row will be added to the table.
Copy and Paste Rows
To paste one or more rows from a spreadsheet created in another program into an Input Table, first copy the data from the other program, and then right-click either the table header or the body of the table. The right-click column menu (on the left below) and the right-click table data menu (on the right below) will show Paste Row.
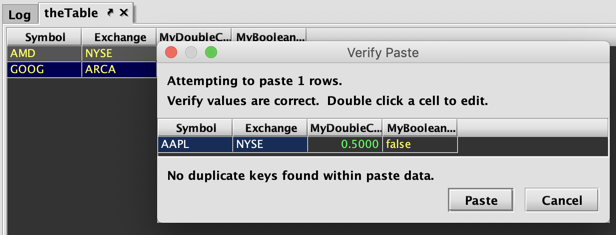
Selecting Paste Row opens the Verify Paste dialog opens with a preview of the additions to the Input Table. This action cannot be undone. If the data is correct, click Paste.
Similarly, you can copy rows from the Input Table into a spreadsheet outside of Deephaven. Select the row you wish to copy and right-click either the table header or the body of the table. Select Copy Row. The highlighted data will now be available on your clipboard.
Editing Rows
The table data menu (as shown above) for the value columns in your Input Table provides additional options: Delete, Edit, Copy, and Set [ColName]. Each option is discussed below.
Set Row
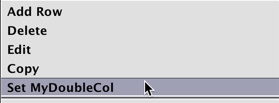
The data in value columns can be manually set using the table data menu. When setting a row, the options available depend on the value type of the column. For example, when the MyDoubleCol cell in the GOOG row is right-clicked, the following menu appears:
Selecting Set MyDoubleCol opens a dialog that allows you to manually input values in that row:
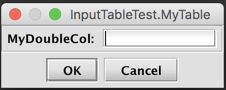
For example, a user can change the value from the previously added row from 0.8 to 0.9.
Clicking on a cell in MyBooleanCol opens a similar right-click context menu. In this case, users can select from options presented in a drop-down menu to set the row value.
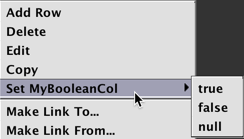
In this example, MyBooleanCol for GOOG changes from true to false.

Edit Row
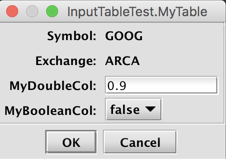
Selecting Edit Row opens a dialog that presents fields for each value column in the Input Table. In this case, users may type a value for MyDoubleCol and choose from the available options for MyBooleanCol.
Delete Row
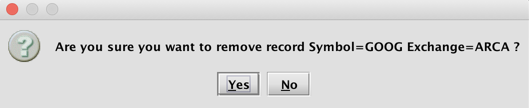
Selecting Delete Row will open a dialog prompting you to confirm whether or not you wish to delete a particular row in the table.
Live Input Table Editor
Another option to make editing your Input Table even easier is to add a Live Input Table Editor (LITE) to the table. The following lines tell Deephaven where to import the class, and then add specify the variable of our table (theTable):
import com.illumon.iris.console.utils.LiveInputTableEditor
LITE=new LiveInputTableEditor(theTable)
Note: You can run these lines directly from the console. If added to a persistent query, "LITE" will appear in the Show Widget menu in the Query Config panel.
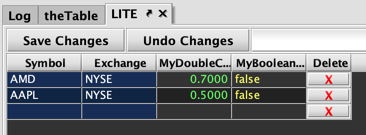
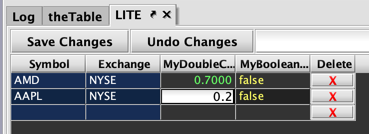
The value column cells of the Input Table can be edited directly. For example, clicking
MyDoubleCol in the second row allows a value to be typed directly into the cell, as shown below.
Clicking MyBooleanCol opens a drop-down menu:
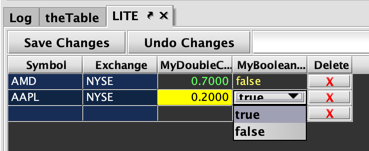
Pending changes made to individual cells will be highlighted yellow in the table. Select Save Changes to permanently accept the edits. Select Undo Changes to remove any pending edits and revert to the previously saved version of the table.
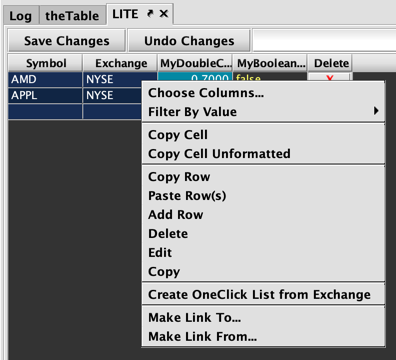
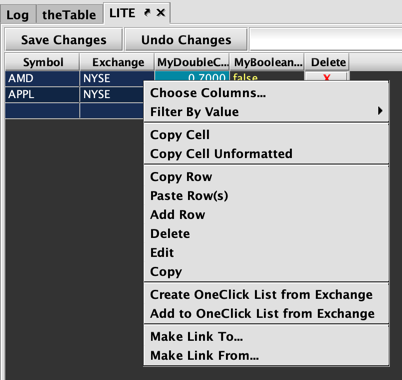
The right-click menus offer the same options to edit the Input Table as discussed above. However, one additional option is available in the right-click table data menu for key columns:
Selecting Create OneClick List from [ColName] opens a dialog to name a new OneClick list:
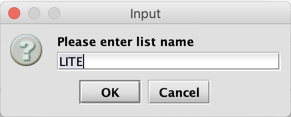
Clicking OK will add the value in the selected cell to a new OneClick list, which will be available in the OneClick List Manager. For example, if the ARCA cell is right-clicked, ARCA will be added to the OneClick list named "LITE." Once a list is created, the right-click table data menu will include an option to add to the list:
To learn more about OneClick lists, see OneClick Filtering with Lists.
Note: In order to sort columns in LITE, use the column header right-click menu.
Input Table Log
To access the underlying live table from the database directly, use the following syntax:
rawInputTable = db.i("InputTableTest", "MyTable").where()
This table includes the full audit log of the Input Table:
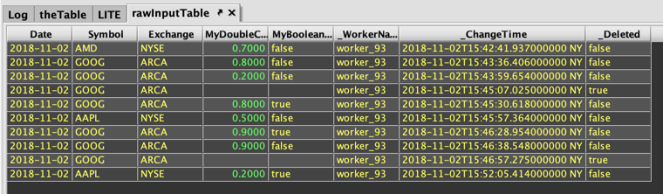
Note: _ServerHostName and _ClientHostName columns have been manually hidden.
The raw data creates an audit trail for the Input Table, and tracks any changes made. This screenshot of rawInputTable shows the rows added, edited, and deleted in the examples above.
Adding or Removing Value Columns
To add or remove columns to/from an existing Input Table, the table's schema needs to be modified. Note: key columns cannot be replaced or removed.
Adding Columns
There are two methods available that must be applied to the InputTableObject:
- .
addColumns(["Col1", "Col2", "Col3"] as String[], [int.class, String.class, boolean.class] as Class[]) .addColumns(Map <String, Class>)
To demonstrate these methods, first let's open the Input Table we created earlier:
theTable = InputTable.inputTable(db, "InputTableTest", "TestTable")
inputTableObj = theTable.getAttribute("InputTable")
The following example adds a fifth column, MyStringCol to TestTable using the first method noted above:
inputTableObj.addColumns(["MyStringCol"] as String[], [String.class] as Class[])
The first line opens the existing Input Table, then the second line gets the InputTableObject. Next, the .addColumns method is used, which defines the name of our new column as String and its type.
Then we need to reload the table:
theTable = InputTable.inputTable(db, "InputTableTest", "TestTable")
The second method noted above creates a map and then adds the map to the Input Table. For example, we can define two new columns, then add the map to InputTableObject as follows:
newCols = new HashMap<>()
newCols.put("NewStringCol",String.class)
newCols.put("NewIntCol", int.class)
inputTableObj.addColumns(newCols)
theTable = inputTableObj.getTable()

Removing Columns
The following method permanently removes a column from an Input Table:
.removeColumns("colName")
For example, to remove MyBooleanCol from TestTable, we again need to modify the InputTableObject and reload theTable:
inputTableObj.removeColumns("MyBooleanCol")
theTable = inputTableObj.getTable()

After tables are modified with any of the methods shown above, they will no longer be compatible with earlier versions of the table. Users should take care to create back-ups of their existing Input Table data in IntradayUser, and the Config table in IntradayUser/_DbConfig/2. To do so, tar/gzip the directories that contain them.
Custom Actions
A Custom Action is a block of custom code (a Groovy closure) that can be run from a table's context menu. Because Custom Action code runs in the Deephaven console, it is aware of the rows the user has selected, and can prompt for additional inputs. This is especially useful for updating Input Tables where combining the user's selection, the user's input, and query data allows sophisticated settings and calculations stored in Input Tables to be easily adjusted on the fly. The values in the Input Table, in turn, can drive further analyses.
To learn more, see Custom Actions.
Note: Custom Actions must be added to a persistent query.
Examples
Add Rows Example
The following example enables a Custom Action to add rows to the Input Table:
inputTable = InputTable.inputTable(db, "InputTableTest", "MyTable")
myAction = { ->
	newRows = emptyTable(1).select(
	"Symbol=`INTC`", "Exchange=`NYSE`", "MyDoubleCol=0.2", "MyBooleanCol=false")
inputTable.getAttribute("InputTable").add(newRows)
	}
addCustomAction(inputTable, "AddRows", myAction)
The first line of the query above opens the Input Table we created earlier: MyTable in the InputTableTest namespace. The next line defines the Custom Action called myAction. Inside the closure, the query includes the syntax to add a row to the Input Table. addCustomAction then adds the action to our Input Table and names it "AddRows."
Once the Custom Action is added to the persistent query associated with an Input Table, it will be included in the right-click table data menu as shown below.
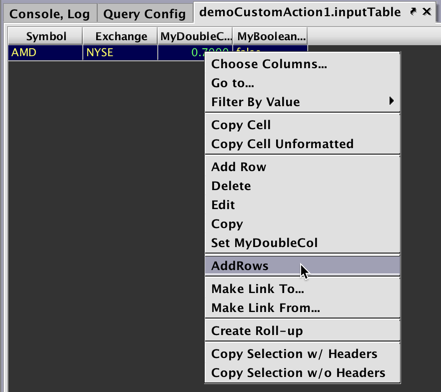
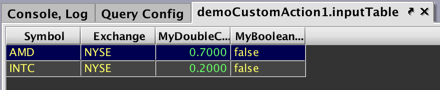
Select AddRows and the row specified in the Custom Action appears in the table.
Delete Rows Example
You can add more than one Custom Action to your persistent query. The following syntax can be joined to our first example persistent query, and enables a user to delete rows in the Input Table.
myAction2 = { ->
	inputTable.getAttribute("InputTable").delete(selectionTable)
  }
addCustomAction(inputTable, "DeleteRows", myAction2)
After running the persistent query, select the rows you wish to delete from the Input Table and right-click within the table data. The context menu now includes DeleteRows.
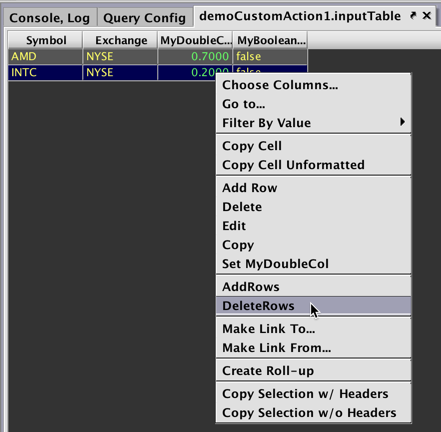
Select DeleteRows and the highlighted row(s) will be removed from the table.

Check Threshold Example
The following Custom Action example query modifies the Input Table based on another Deephaven table. The Custom Action checks whether or not each USym on each Exchange reached a price threshold that a user specifies, and sets true or false appropriately in an Input Table
import javax.swing.JOptionPane

trades = db.t("LearnDeephaven", "StockTrades").where("Date=`2017-08-25`")

inputTableObj = InputTable.newInputTable(db, "InputTableTest", "CustomActionTable",
	cKey("USym", String),
	cKey("Exchange", String),
	c("AboveThreshold", boolean)
	)

inputTable = inputTableObj.getTable()

inputTable = InputTable.inputTable(db, "InputTableTest", "CustomActionTable")

checkThreshold = { ->
		String threshold = JOptionPane.showInputDialog(parentFrame, "Threshold:")
		usymExchangeCheck = trades.view("USym", "Exchange", "MaxPrice=Last").maxBy("USym", "Exchange").updateView("AboveThreshold=MaxPrice>$threshold")
		inputTable.getAttribute("InputTable").add(usymExchangeCheck)
	}

addCustomActionNoSelection(trades, "Check Threshold", checkThreshold)
The first line of this query imports JOptionPane, which contains methods for user input, and is required for the Custom Action to function properly.
The second line of the query creates the trades table using data from the StockTrades table in the LearnDeephaven namespace, which is then filtered to include only data from August 25, 2017.
Next, a new Input Table, CustomActionTable, and associated inputTableObject are created in the InputTableTest namespace. This table will include two key columns, USym and Exchange, and one value column, AboveThreshold that will show either true or false.
The fifth line of the query creates inputTable in the console.
The sixth line of the query defines the Custom Action. As mentioned earlier, JOptionPane contains the method .showInputDialog, which creates a dialog window prompting users to enter a value ("Threshold:"). The Custom Action will check whether or not each row in the table has reached the threshold entered by the user. This formula is contained in the variable usymExchangeCheck, and added as an attribute to the Input Table.
Finally, the Custom Action named "Check Threshold", which does not require a selection in the table, is added to the trades table.
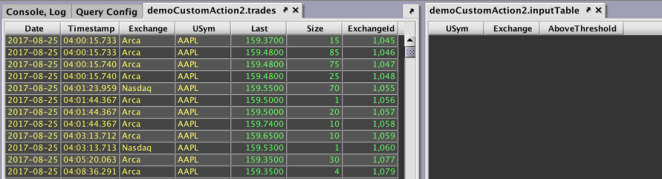
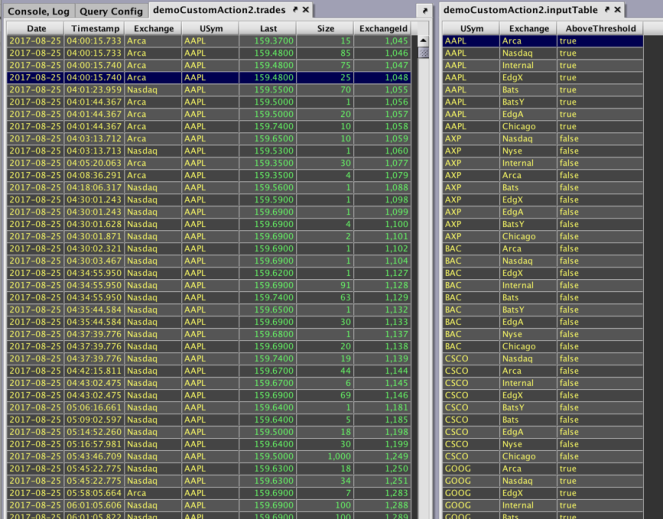
The following image shows the two tables, trade and inputTable, nested side-by-side in the Deephaven Console. inputTable contains no data until the Custom Action is triggered.
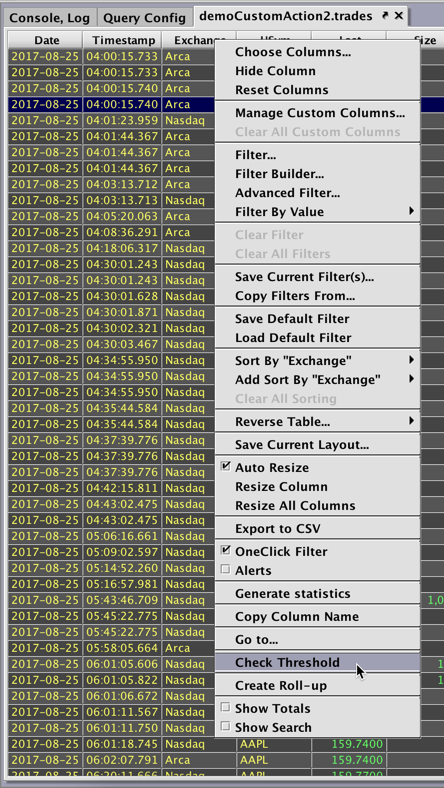
The Custom Action Check Threshold is available in the right-click column header menu for the trades table, as shown below.
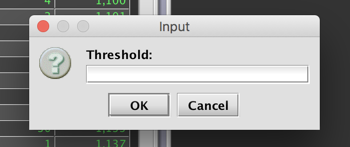
Select Check Threshold. The Input dialog window opens prompting users to enter a value in the Threshold field.
To test the function, let's enter 100 into the Threshold field and click OK. Deephaven will then check if each row in the trades table is above the value entered, and add the results to inputTable. For each USym on the distinct stock exchanges in the table, the AboveThreshold column indicates true when above the specified threshold, or false when equal to or below that threshold.
Replace the Input Table
It is possible to replace the entire table at once using the InputTable.replace() method in a query. Any keys that are currently in the Input Table, but not in the new dataset, will be removed.
Example
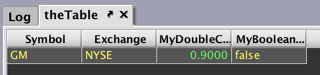
newRows = emptyTable(1).select("Symbol=`GM`", "Exchange=`NYSE`", "MyDoubleCol=0.9", "MyBooleanCol=false")
inputTableObj.replace(newRows)
This query replaces the data in MyTable in the InputTableTest namespace as follows:
Setting Input Table Permissions
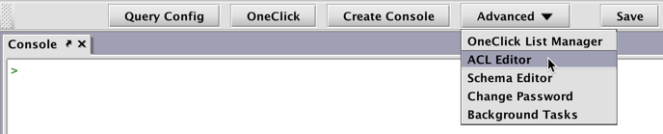
The ACL Editor in the Deephaven console allows authorized users to configure access to the Input Table(s). To review or edit these permissions, click the Advanced button at the top of the console, then select ACL Editor.
You will be prompted to enter a new panel title.
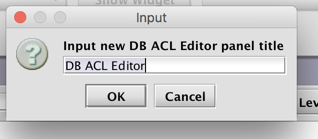
Click OK. When the DB ACL Editor panel opens, navigate to the Input Tables tab.
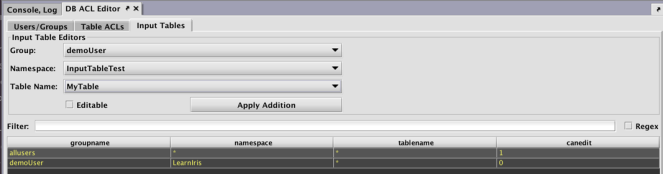
The Input Tables tab allows you to choose which groups of users are authorized to write to the Input Table. Locate your Input Table using the Namespace and Table Name drop down fields. In the example below, the group demoUser will be granted access to MyTable. Click Apply Addition to make the changes.
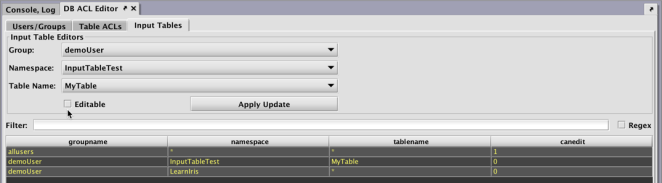
Now any user in the demoUser group can view MyTable. However, the column canedit shows 0, which means these users cannot edit the table. Selecting the Editable checkbox allows users to write to the table.
Deleting Input Tables
In order to delete all the data from an Input Table, the following syntax is used:
theTable.getAttribute(Table.INPUT_TABLE_ATTRIBUTE).remove()
In this case, theTable is the variable name we assigned to the Input Table.
Note: Do not delete or modify a table schema from one query while that table is in use by another query. If you delete an Input Table, you must restart the Input Table server (Data Import Server) before creating a new table of the same name.