OneClick Filtering
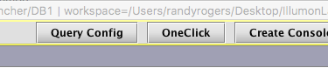
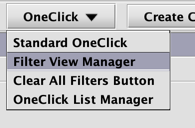
The OneClick button at the top of the Deephaven console offers the following menu items:
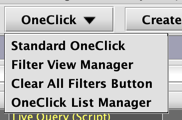
Each option is discussed below.
OneClick
The OneClick filter is used for advanced filtering of data. By itself, the OneClick filter does not do anything. However, when you pair the OneClick filter with tables, or plots, or both tables and plots, it becomes a powerful tool for analysis.
A quick example of using the OneClick filter follows. However, please refer to the rest of the documentation for more details about each option and feature.
If you wanted to look at the data for only one particular USym, you could sort the table on the USym column and then scroll through the table until you found the particular USym you were seeking. Or, you could write another query to limit the content to one particular USym, but that would be time-consuming and inflexible — you'd have to write new code for each USym. Or, you can use the OneClick filter.
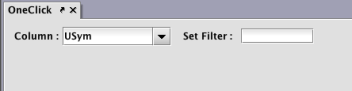
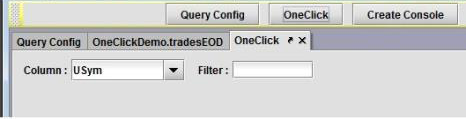
To initiate the process, click OneClick at the top of the Deephaven interface and select Standard OneClick. Deephaven then generates a panel in the console with a tab labeled OneClick. See below:
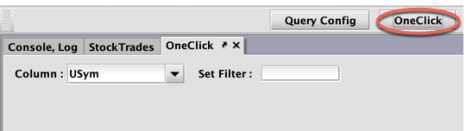
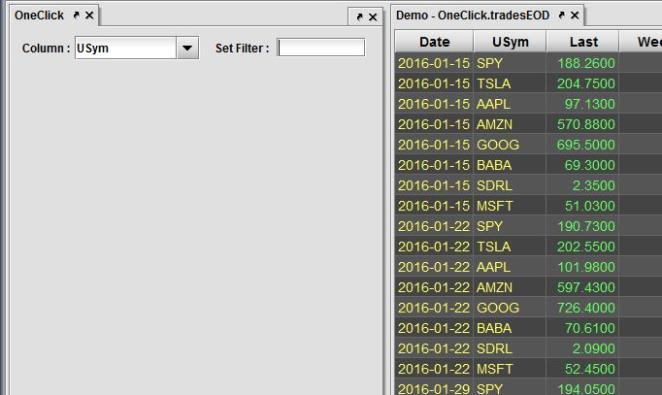
The new OneClick panel does not do anything by itself; it needs to be paired with data. So, the next step is to nest the OneClick panel within the panel containing the data you want to interactively filter:
To filter the data in the table with the OneClick filter, you first need to select the name of the column to be filtered. In this case, we want to filter the data in the column named USym, so there is no need to change that value in the Column list. We can then enter the value in the Set Filter field, and press the Enter key.
As you can see below, it is easy to change the filter among multiple USyms. The table is filtered from "GOOG" to "IBM" to "MSFT" in a matter of seconds:
Again, this is just a quick example to show how the OneClick filter can work. However, OneClick can do much more. Be sure to review more of the documentation so you can take advantage of all its features.
How to Use the OneClick Filter
Accessing the OneClick Panel
To access the OneClick panel, click the OneClick button at the top of the Deephaven interface.
The first time you open the panel in Deephaven, the Column and Set Filter fields are shown.
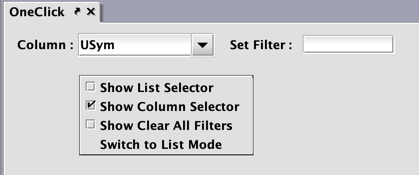
When you right-click in the panel, additional options are presented, including Show List Selector, Show Column Selector, Show Clear All Filters and Switch to List Mode, as shown below. Details about these options follow:
Show Column Selector
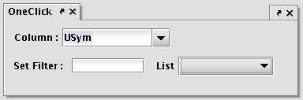
When Show Column Selector is selected, the OneClick panel enables content filtering based on the values entered in the Column field and the Set Filter field. See image below.
For example, to filter the shared workspace on a single value, select or enter the name of the table's column in the Column field, and then enter the filter value in Set Filter field. After pressing Enter, the table(s) and/or plot(s) contained in the shared workspace will be filtered to the value entered.
To learn more, see: OneClick Filtering on Individual Values.
Show List Selector
When Show List Selector is selected, the OneClick panel enables content filtering based on the values in a OneClick List. You can filter the content of the shared workspace on all values in the list (collectively) or by cycling through individual values in the list one at a time. To learn more, see: OneClick Filtering with Lists.
Show Clear All Filters
When Show Clear All Filters is selected, the OneClick panel will include a button that clears all filters for all items paired with the OneClick panel, such as Tables, Pivot Widgets, and Charts.
![]()
Switch to List Mode
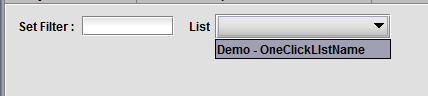
When Switch to List Mode is selected, you first need to select a OneClick List from the drop-down menu as shown below.
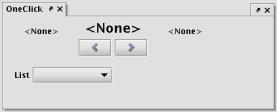
Note: If a OneClick List has not yet been created, there will not be any options available for selection in the List drop-down menu.
To learn more about creating OneClick Lists, see: OneClick Filtering with Lists.
Once a OneClick List has been selected from the List drop-down menu, the values from that list are presented individually as shown in the image below.
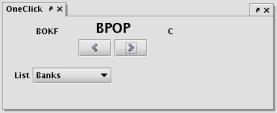
You can cycle through each individual value in the OneClick List by clicking the left arrow or right arrow buttons under the value. Each time you change the value, the workspace is filtered to that individual value.
Switch to Text Mode
When Switch to Text Mode is selected, you also need to select a OneClick List from the drop-down menu as shown below.
Once a list is selected, the content in the table of shared workspace will be filtered based on all of the values contained in the OneClick List selected.
Pairing the OneClick Filter with Tables and Plots
The OneClick filter is designed to interactively filter data in tables and plots that have already been created in Deephaven. For this to occur, the OneClick panel needs to be paired with the data. This pairing is accomplished by nesting the OneClick panel with the panel (or panels) that contain table(s), plot(s) or any combination of tables and plots. To do that, you first need to find the tab for the panel containing the table you want to pair with the OneClick panel. Once it is located, you can click, hold and drag the tab over to the panel containing the OneClick panel, and release the mouse. The two panels have now become embedded in the same panel group.
Using the OneClick Filter on Tables
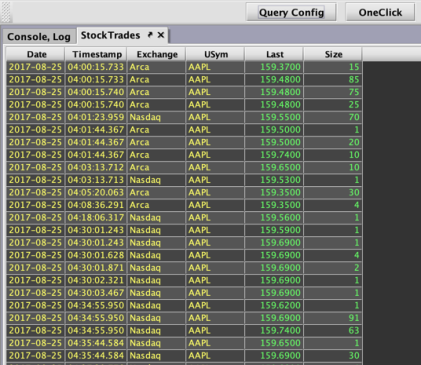
The OneClick filter can be used to filter the contents of a table using individual values or a list of values. For example, the table shown below includes the final price of several different securities traded on consecutive Fridays.
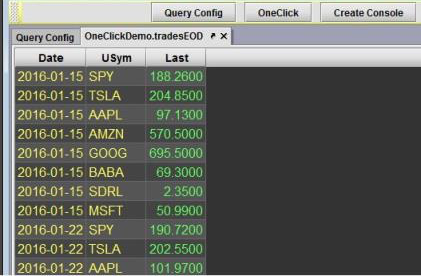
If you want to look at the data for only one particular USym, you could sort the table on the USym column and then scroll through the table until you found the particular USym you were seeking. Or, you could write another query to limit the content to one particular USym, but that would be a lot of work. Or, you can use the OneClick filter.
To initiate the process, click OneClick at the top of the Deephaven interface. Deephaven then generates a panel in the console with a tab labeled OneClick. See below:
The new OneClick panel does not do anything by itself; it needs to be paired with data. So, the next step is to nest the OneClick panel with the panel that has the data you want to interactively filter. To do that, you first need to find the tab for the panel containing the table you want to pair with the OneClick panel. Once it is located, you can click, hold and drag the tab over to the panel containing the OneClick panel, and release the mouse. The two panels have now become embedded in the same panel group.
The image below represents the OneClick panel nested with a table in the same panel group.
It is now ready to interactively filter your data on individual values or on the values found in OneClick Lists.
See: OneClick Filtering with Individual Values and OneClick Filtering with Lists.
The previous example shows the OneClick filter nested with only one table in the same panel group. However, the OneClick can also filter the content of multiple tables in the same panel group as long as each table contains same the column selected in the Column field of the OneClick panel.
Using the OneClick Filter on Plots
When using the OneClick feature to filter a plot (or plots), the data source must be a SelectableDataSet. This is easily accomplished with the use of the oneClick method.
Syntax
oneClick(source, "ColName1", "ColName2", …)
sourceis the table containing the data.- Additional arguments represent the name(s) of each column (as a string) to be available for filtering via the OneClick feature.
Example
t = db.t("LearnDeephaven","StockTrades")
  .where("Date=`2017-08-25`")
  .where("USym in `AAPL`,`PFE`,`BAC`,`IBM`,`CSCO`,`INTC`")
toc = oneClick(t, "USym")
RetailPlot = plot("USym", toc, "Timestamp", "Last").show()
| Code |
Explanation |
|---|---|
|
|
The first line of the query sources the live data for the current day for six different |
|
|
The second line of the query applies the |
|
|
The third line of the query creates a plot using data from the variable |
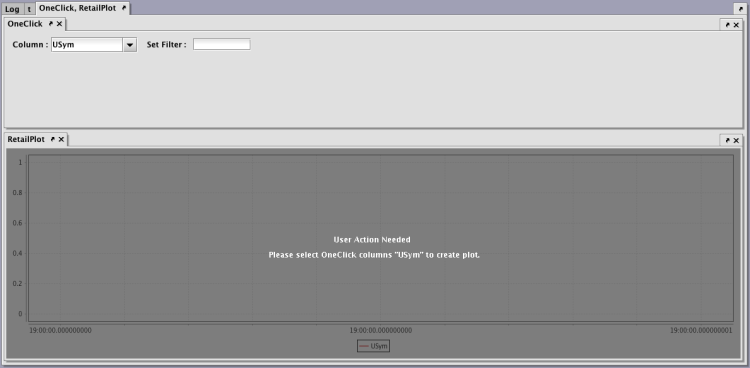
When the query runs, a panel named RetailPlot is presented in the console, as shown below. The data used to generate the plot is a SelectableDataSet now, so no data is being shown.
![]()
To show the data, the OneClick filter first needs to be nested in the same panel group as the plot, as shown below.
See: Customizing Your Workspace for more information about nesting panels in the Deephaven console.)
Once an appropriate value is entered into the OneClick filter, the plot for that USym appears.
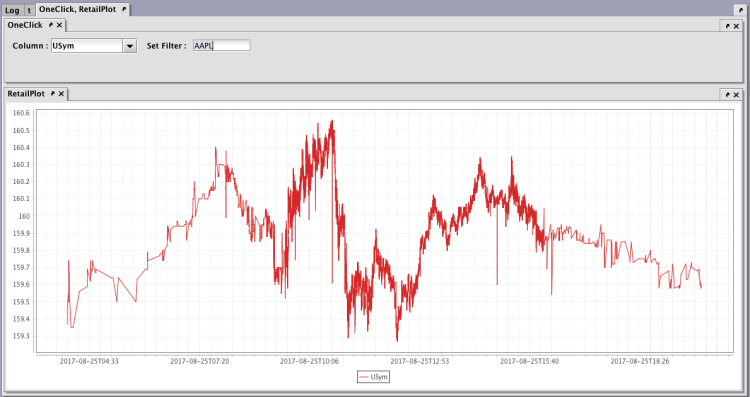
To see a different USym plotted, enter its value in the OneClick filter to generate the plot.

Using the OneClick Filter on Multiple Tables and Plots
Just as with individual tables or individual plots, the OneClick filter functions only when it is nested in the same panel group as the data being filtered. The number of tables and plots contained in the panel group does not matter—only that the OneClick panel is embedded in the same panel group. Therefore, to filter on multiple tables, multiple plots or any combination of both, all of the tables and/or plots must be embedded in the same panel group as the OneClick panel.
The following example demonstrates how to use the OneClick panel with one table and one plot. However, additional tables and/or plots can be added using the same steps shown.
First, ensure the desired table and plot are both open in the workspace. Next, open a OneClick panel by clicking on OneClick at the top of the interface. Find the tab for the panel containing the table you want to pair with the OneClick panel. Once it is located, click, hold and drag the tab for that table over to the panel containing the OneClick panel, and release the mouse. The two panels have now become embedded in the same panel group. Repeat this process to nest the plot into the same panel group.
With all three panels now sharing the same panel group, you can now use OneClick to filter both the table and the plot based on individual values or on the values found in OneClick Lists.
See: OneClick Filtering with Individual Values and OneClick Filtering with Lists.
There may be times when you do not want to apply the OneClick filter on some of the tables contained in the panel group. For example, you may have seven tables in a panel group but only want the OneClick filter to function with five of those tables. This can be accomplished by disabling OneClick on a specific table.
See: Disabling OneClick Filtering to learn more.
OneClick Filtering with Individual Values
The OneClick panel can be used to filter on any individual value found in your data.
To filter on an individual value, first select the name of the column containing the data you want to filter. The value "USym" is the default entry in the Column drop-down menu. However, you can change the value contained in the Column field by either typing in a new value or using the drop-down menu to select a different value. You can also change the default value used in the Column field.
See: Changing the Default Column Value for OneClick Filtering
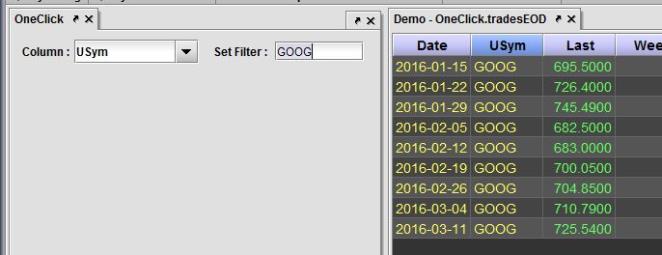
In the example below, USym is the name of the column to be filtered, so there is no need to change the value in the Column field.
The next step is to enter the value to be filtered into the Set Filter field, and press Enter.
For example, if you type "GOOG" and press Enter, the table shows only the data for Google, as shown below.
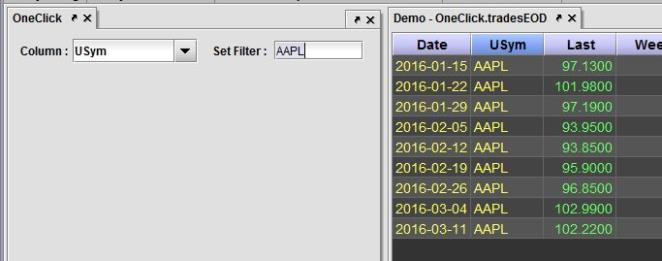
Or, if you type "AAPL" and press Enter, the table shows only the data for Apple, as shown below.
You can also use the OneClick panel to filter a table on multiple individual values.
See: OneClick Filtering on Multiple Values.
OneClick Filtering with Lists
The OneClick panel can also be used to filter your data based on the values contained in lists that you create, called OneClick Lists.
To filter to a OneClick List you must first create one.
Creating OneClick Lists
There are two ways to create a OneClick List.
- Create a OneClick List using the OneClick List Manager
- Create a OneClick List from Values in a Table
Create a OneClick List using the OneClick List Manager
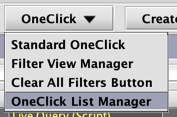
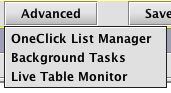
To access the OneClick List Manager, click OneClick at the top of the interface, and then choose OneClick List Manager from the drop-down menu.
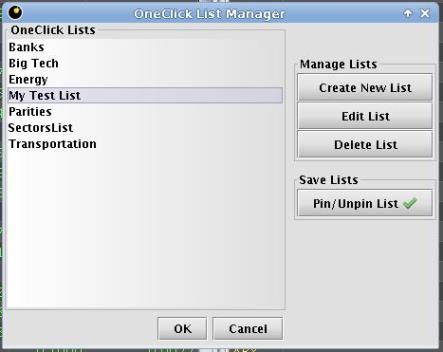
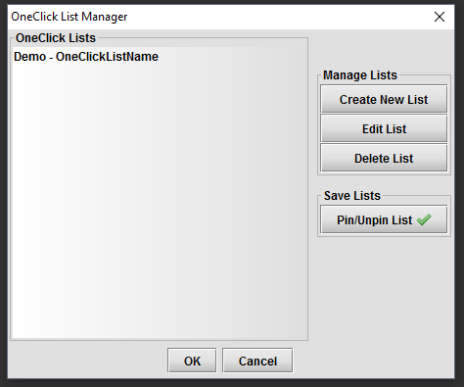
As shown below, the OneClick List Manager includes a list of all existing OneClick Lists on the left side (if there are any). On the right side of the window, there are options to Create, Edit, Delete and to Pin/Unpin List.
To create a new list, click Create New List. For additional instructions, please refer to Create New List.
Creating a OneClick List from Values in a Table
You can also create lists directly from the data in a table. To do so, place your mouse cursor in the column of the table containing the values you want to include in the list. Next, click and drag your mouse over the table so all of the values you want to include are highlighted. (Note: Entire rows will be highlighted as your drag your cursor over the table. However, the OneClick List is created using only the values in the first column in which you originally clicked.) Release the mouse after you've highlighted all of the values to be included. Then right-click in the highlighted area and select Create OneClick Listfrom <column name> in the drop-down menu. In the example below, you would select Create OneClick Listfrom USym.

After selecting Create OneClick Listfrom USym, you will be prompted to provide a name for the list, as shown below.
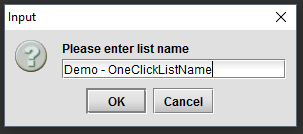
After naming the new list, click OK, and the name of the new OneClick List will be added to the left side of the OneClick List Manager.
The new OneClick List will also become available in the List drop-down menu located in the OneClick panel.
Adding to a OneClick List from a Table
You can also add values from a table to an existing OneClick list. To do so, place your mouse cursor in the column of the table containing the values you want to include in the list. Next, click and drag your mouse over the table so all of the values you want to include are highlighted. (Note: Entire rows will be highlighted as your drag your cursor over the table. However, the OneClick List is created using only the values in the first column in which you originally clicked.) Release the mouse after you've highlighted all of the values to be included. Then right-click in the highlighted area and select Add to OneClick List from <column name> in the drop-down menu.
Managing OneClick Lists
OneClick Lists are managed through the OneClick List Manager. To access the OneClick List Manager, click the Advanced button at the top of the Deephaven interface, and then choose OneClick List Manager from the drop-down menu.
As shown below, the OneClick List Manager window includes a list of all existing OneClick Lists on the left side (if there are any). On the right side of the window, there are options to Create, Edit, Delete, and to Pin/Unpin List.
Create New List
After clicking Create New List, the following dialog window will open:
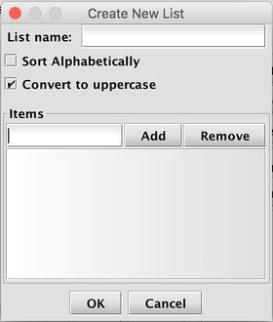
Enter the name of the new list in the field to the right of List name.
If you want the contents of the list to appear in alphabetical order, select the Sort Alphabetically check box.
If you want all of the list values to be converted to uppercase, select the Convert to uppercase check box. This is particularly useful when all of the values in a given column are already presented in uppercase (e.g., USym column). If the check box is not selected (or deselected), the values will return to the same case used when they were entered.
You can add values to the new list by typing each individual value into the field under Items and then clicking Add. The new value will be added to the field under the Add button. If you need to remove an item, select the item in the field and then click Remove. (You can also shift-click or Ctrl-click to remove multiple items.)
When you have finished adding values to the list, click OK to save the list or Cancel.
After naming the new list, click OK, and the new list will be added to the left side of the OneClick List Manager. The new OneClick List will also become available in the List drop-down menu located in the OneClick panel.
Edit List
To edit a list, select the name of the list from the left side of the OneClick List Manager window and then click Edit List. The list editor window will open and present the options available. You can change the name of the list, add values or remove values. When you have finished editing the list, click OK to save the list or Cancel to cancel the editing process.
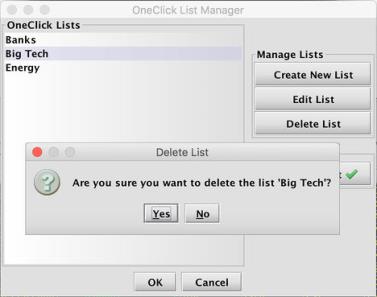
Delete List
To delete a list, select the name of the list from the left side of the OneClick List Manager window and then click Delete List. A dialog box will then open, asking you to confirm or cancel the process.
Pin/Unpin List
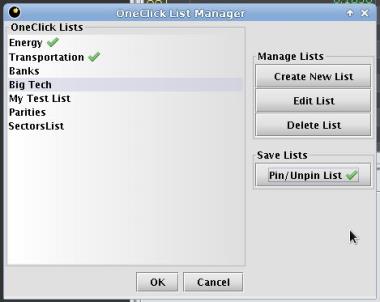
All OneClick lists are presented in alphabetical order in the OneClick List Manager window. However, when you "pin" a OneClick List, you are telling Deephaven to move that list to the top of the list of OneClick Lists in the OneClick List Manager (and the List drop-down menu in the OneClick panel). This is especially useful if you maintain many different OneClick Lists.
To use the Pin/Unpin List feature, you must first select the name of the list you want to pin to the top of the OneClick List list. After selecting the name of the OneClick List, click Pin/Unpin List, and the list will be moved to the top of the list. A green checkmark will appear adjacent to the list name, indicating that the list is pinned.
You can pin multiple lists. When multiple lists are pinned, they will be presented in their own alphabetically ordered group at the top of the list. For example, in the image below, the Energy and Transportation lists are pinned, and they appear in alphabetical order within their own group.
To unpin a list, select the name of a pinned list and click Pin/Unpin. That list will then be moved back among the lists that are not pinned.
Using OneClick Lists
There are two ways to filter data in Deephaven using a OneClick List. Both are accessed through the OneClick panel.
List Drop-down Menu
The List drop-down menu is an available option in the OneClick panel.
For additional information, please refer to Accessing the OneClick Panel.
To view the List drop-down menu, right-click in the OneClick panel and select the check box for Show List Selector. When the List drop-down menu appears, click on the down arrow and select the list with which you want to filter, as shown below.
When you release the mouse, the data paired with the OneClick filter will be filtered with the respective content of the OneClick List selected.
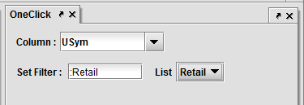
Entering OneClick List Names into the Set Filter field
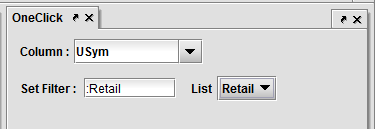
You can also type a OneClick List name into the Set Filter field. However, to use this option, you must first enter the OneClick List Prefix before the list name.
The OneClick List Prefix is used to distinguish a OneClick List name from an individual value. The default value for the prefix is a colon (:). To enter a OneClick List name into the Set Filter field, you would first type a colon, and then the name of the OneClick List.
For example, to use the list named "Retail" in the Set Filter field, you would type ":Retail".
Note, the OneClick List Prefix defaults to the colon symbol. However, you can change the default prefix symbol by clicking Settings in the top of the Deephaven interface, and then selecting a different option in the OneClick List Prefix setting. Other available values include the forward slash (/), the "at" sign (@) and the exclamation mark (!).
See:Changing the Default OneClick List Prefix
OneClick Filtering on Multiple Values
The OneClick panel can be used to filter on multiple values. These values can include multiple individual values, OneClick Lists, or a combination of both.
See: Entering OneClick List names into the Set Filter field.
To filter on multiple values, type the first value into the Set Filter field and press Enter. That will filter the data in the panel group on that single value.
To add an additional value, repeat the steps above, but instead of pressing Enter, first hold down the Ctrl key and then press Enter. Your content will then be filtered on both values entered.
You can add additional filter values by repeating the same steps.
For example, if you wanted to filter the workspace based on two individual values and one OneClick List, you would do the following.
For this example, we will assume the individual values are AAPL and GOOG, and then add a OneClick List called TechStocks.
The Column value is set to USym, so you would type AAPL into the Set Filter field and press Enter. Your workspace would then be filtered on the value AAPL. To filter on the additional individual value, type GOOG into the Set Filter field, hold down the Ctrl key and then press Enter. Your workspace is now filtered on the two individual values of AAPL and GOOG.
Finally, to include the values in the OneClick List, type ":TechStocks" into the Set Filter field. This is the OneClick Prefix (a colon) followed by the name of the OneClick List. Then, hold down the Ctrl key and press Enter. Your workspace is now filtered to AAPL, GOOG, and the values found in the OneClick List named TechStocks.
You can also nest multiple OneClick panels to filter the same table. For example, the example below pairs both a standard OneClick filter and a OneClickList filter to the StockTrades table:
OneClick Settings
Changing the Default Column for OneClick Filtering
When you first use the OneClick feature in Deephaven, "USym" is used as the default value in the Column drop-down menu, as shown below.
You can change the value contained in that field by either typing a new value into the field or by using the drop-down menu to select a different value. However, you can also change the default value.
To change the default value used, click Settings at the top of the Deephaven interface and then type in a new value in the field labeled Default OneClick Panel Column, as shown below.

Changing the Default OneClick List Prefix
The OneClick List Prefix is used when you want to enter a OneClick List name into the Set Filter field found in the OneClick panel. The Prefix is used to distinguish the list from an individual value.
The default value for the prefix is a colon (:). To enter a OneClick List name into the Set Filter field, you would first type a colon, and then the name of the OneClick List. For example, to use the list named "ListOne" in the Set Filter field, you would type ":ListOne".
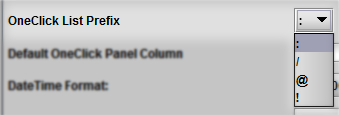
You can change the default OneClick List Prefix symbol by clicking Settings in the top of the Deephaven interface, and then selecting a different option as shown below. Other available values include the forward slash (/), the "at" sign (@) and the exclamation mark (!).
Disabling OneClick Filtering for a Table
OneClick filtering is, by default, enabled for every table in Deephaven. However, there may be times when you do not want OneClick to filter on one or more of the tables contained in the same panel group. For example, you may have seven tables in a panel group, but only want the OneClick filter to function with five of those tables.
OneClick can be disabled on any table by right-clicking anywhere in the header column for the table, and then deselecting the OneClick Filter check box as shown below.

To re-enable the OneClick filter on a given table, right-click in the column header and select the OneClick Filter check box.
See also: Configuring OneClick Restrictions.
Filter View Manager
Deephaven's Filter View Manager allows users to save a collection of filters, called Filter Views, across an entire set of panels. This makes it easy to apply different filters to a variety of panels in the same group all at once. Filter Views provide a finer degree of control over the various filters applied, and also expedites restoring filters across all panels. As with a OneClick panel, the Filter View Manager panel must be paired with the tables for the Filter Views to be applied.
Filter View Manager Panel
To use the Filter View Manager, click OneClick at the top of the user interface, and select Filter View Manager from the drop-down menu.
A new Filter View Manager will open in its own tab.
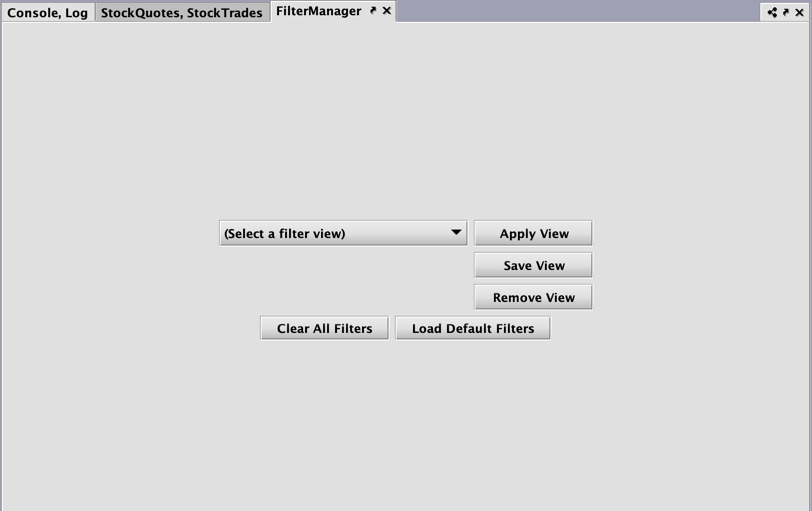
Next, pair the FilterManager panel with the desired content you want to filter. To do that, locate the tab with the table(s), then click, hold and drag the FIlterManager tab over to the active panel and release the mouse. The two panels have now become embedded in the same panel group.
Once the FilterManager tab is nested into a panel group, it can be used to save, remove, and reload various Filter Views that you create. The filters selected will apply to all panels nested together, and will not affect views on any other top-level tabs.
The Filter View Manager will save any filters applied to your panel group as a set, including OneClick filters and filters applied per column. Each button is described below.
Filter Views
Select a Filter View
Select a FIlter View shows all of the Filter Views that have been created thus far, with the names the user has given them.

Save View
The Save View button allows a user to save all of the filters in place in the panel group with a descriptive name. This makes it easy to restore that set of filters later. Multiple different Filter Views of this sort can be saved, allowing for quick switching between views of the same data.
Apply View
Apply View will replace the current filters in your panel group with the filters defined in the Filter View indicated in the Select a FIlter View drop-down. Note that if you have added new tables since the Filter View was created, those new tables will not be affected; the Filter View has no effect on tables that did not exist when it was created. If a filter saved in a Filter View was triggered by a OneClick panel, loading that Filter View will not reopen a closed OneClick panel, although it will reapply the most recent associated filter.
Remove View
Remove View will remove/delete the Filter View indicated in the Select a FIlter View drop-down menu.
Clear All Filters
Clear All Filters will clear all filters from the panel group, the same as the Clear All Filters button on the OneClick panel. A separate Clear All Filters panel, available from the OneClick drop-down menu at the top of the interface, can also be added to the workspace containing only a Clear All Filters button. This can be useful if a user has multiple OneClick panels open, or does not want to use OneClick but does need to be able to clear filters easily.
Load Default Filters
Load Default Filters allows a user to restore the default filters for all tables within the panel group at once. See: Save Default Filter and Load Default Filter.
Clear All Filters Button
![]()
This selection from the OneClick menu opens a Clear All Filters button in a new tab in your workspace.
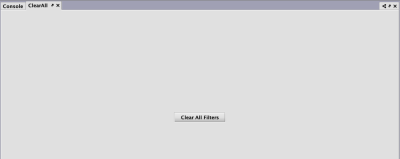
Just as with OneClick panels, the ClearAll panel must be paired with other tabs. Clicking the button will remove all filters within a panel group.
Last Updated: 16 February 2021 18:07 -04:00 UTC Deephaven v.1.20200928 (See other versions)
Deephaven Documentation Copyright 2016-2020 Deephaven Data Labs, LLC All Rights Reserved