Create Roll-up Tables
Overview
When working with tables, it is often useful to view the table as a structured hierarchy and to "roll-up" aggregations at each level of the hierarchy. Roll-up Tables allow users to reduce a large, detailed data set to show only certain, customized aggregated column values. Similar to pivot tables, Roll-up Tables provide the option to group your data by a specified "Group By" column, and then display total values (such as sum or average) of other columns in the tables for those distinct items in the "Group By" column. In other words, if you select Sym as your "Group By" column, and then select the AskSize and BidSize columns to be aggregated as an average, your original table will reload into an expandable table with three columns showing the average AskSize and BidSize for each distinct Sym in the the dataset.
Once created, Roll-up Tables can also be sorted or filtered to extract further insights.
Creating Roll-up Tables can be accomplished through the query language or in the Deephaven console using the Create Roll-up option in the right-click table data menu.
The following section details how to create a Roll-up Table in a Deephaven console. See: Configuring Roll-up Tables through a Query for more about using query methods.
Create Roll-up
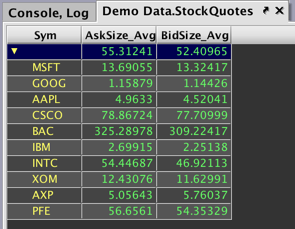
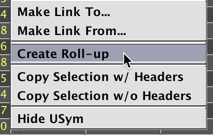
You can create a Roll-up Table from any table in Deephaven. Right-click anywhere within the table data and select Create Roll-up.
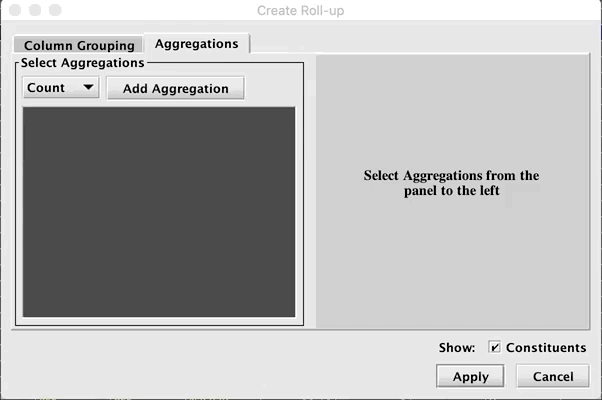
When selected, the Create Roll-up dialog window will present options that can be used to group and aggregate the data in different and multiple ways. The following screenshot below demonstrates the options available when the Create Roll-up feature is activated using the StockQuotes table in the LearnDeephaven namespace:
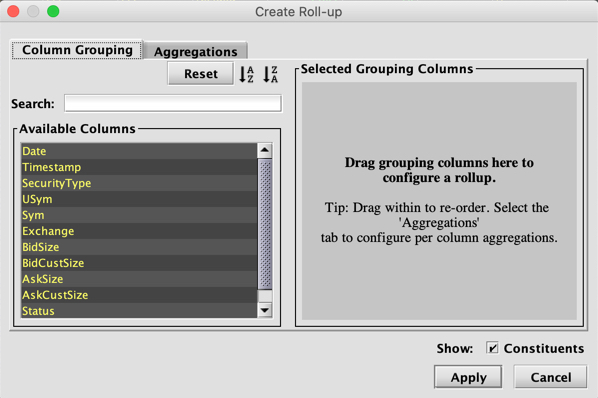
This window contains two tabs: Column Grouping and Aggregations. The first Column Grouping tab (shown above) controls how the table will roll-up. The left side shows the available columns in the table, while the right side is used to select the column(s) by which to group the table data. The second Aggregations tab configures the aggregation operations in the resulting Roll-up table.
Selecting Grouping Columns
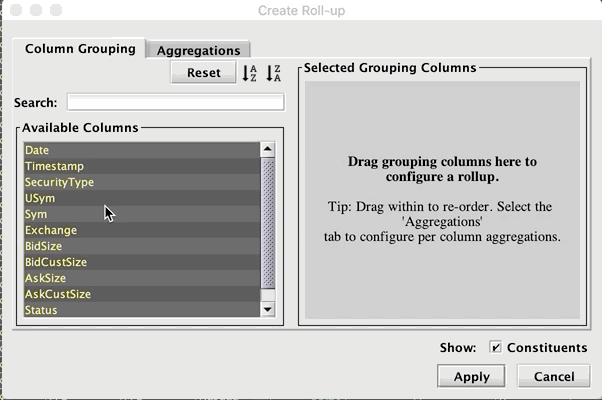
The left hand panel in the Column Grouping tab displays the columns which are allowed to participate in grouping. Hovering over these columns will display the column description, if one was provided by the query writer. Additionally, you may use the sort controls to sort the columns alphabetically either ascending or descending, or to reset the order. The search box can be used to search for a particular column.
Simply drag the columns from the left hand side onto the right hand side to add them to the set of grouping columns.
It is important to recognize that the order of the columns defines the order in which the table is rolled up. For example, consider the following two Roll-up tables.
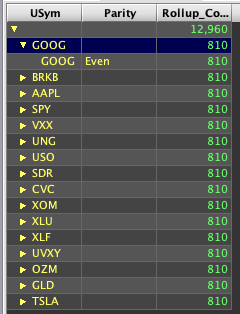
The table below is first grouped by "USym", and then by "Parity":
|
|
|

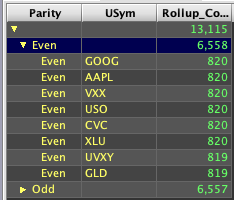
In the next example, however, the table is first grouped by "Parity" and then "USym":
|
|
|
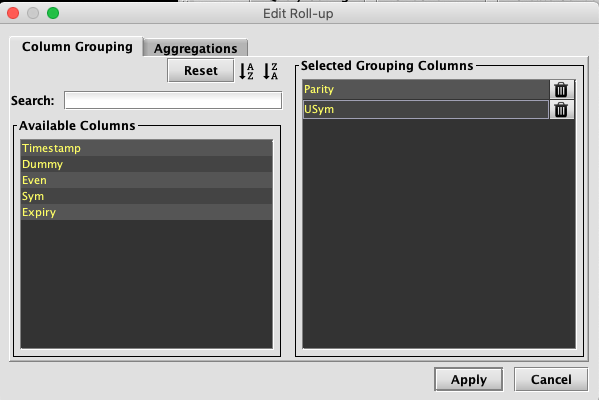
Once you have added columns to the set of selected grouping columns you may double-click and drag to reorder them within the set of selected columns. You may also remove grouping columns by dragging them back to the Available Columns panel, or clicking on the trash can icon ( ) to the right of the column name.
Configuring Aggregations
While simply grouping rows from the original table may be useful, Roll-ups become a powerful tool when paired with column-level aggregations. You can do this in the Aggregations tab.
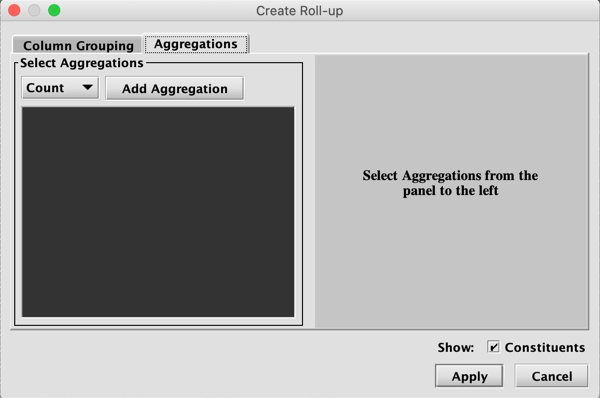
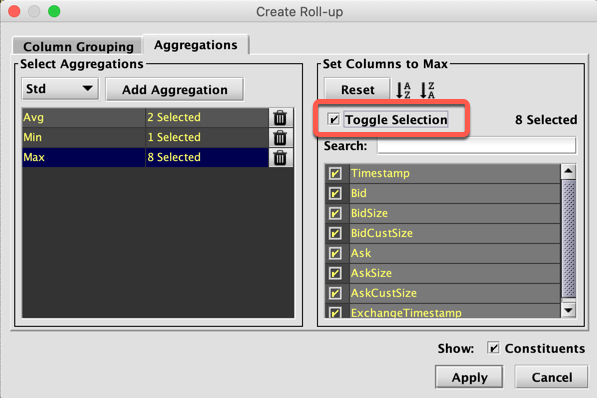
First, select an aggregation from the drop down menu on the left, then click Add Aggregation. This will add a row to the list on the left for the aggregation you selected. Once you have added an aggregation you must then select which columns should be aggregated for each type of aggregation. On the right hand side there is a list of available columns with checkboxes. Simply click on the checkbox to select that column to be aggregated, and check it again to deselect it.
The Operation column will only display aggregations that are meaningful for the data type found in that column. For example, if you select columns with numeric data such as Ask or Bid, operations will include any aggregations that are meaningful for numerical data, including calculations for sum, average, standard deviation, and more. However, if you select text-based columns such as USym or Exchange, you can only choose to count the rows, show the First/Last item in the column, or show the Min (alphabetically first)/Max (alphabetically last) item in the column.
You may select as many aggregations as you like. Clicking on the aggregation in the left hand panel will display the selection for that aggregation on the right hand side. Note: while you cannot use a column again once it is added to the Group By field, you can assign different aggregation operations to the same column.
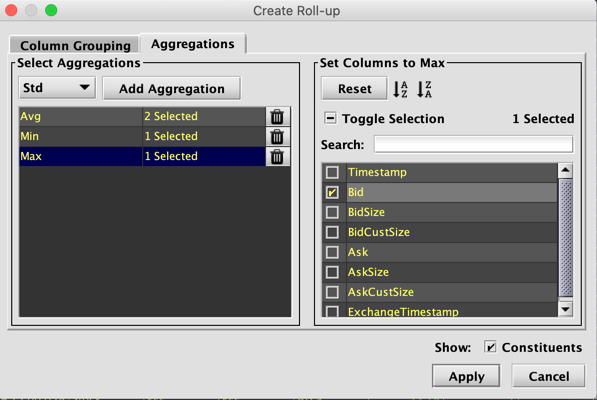
You may also click-and-drag to rearrange the order of aggregations. This will change the order of the columns in the result table. Aggregations can be removed by clicking on the trash can () icon.
You may use the Toggle Selection checkbox to either select all, or select none of the columns.
The search bar and sorting controls function the same way here as they do in the Column Grouping tab.
Finally, selecting Apply will create and display the configured Roll-up, and Cancel will abort the operation and close the UI.
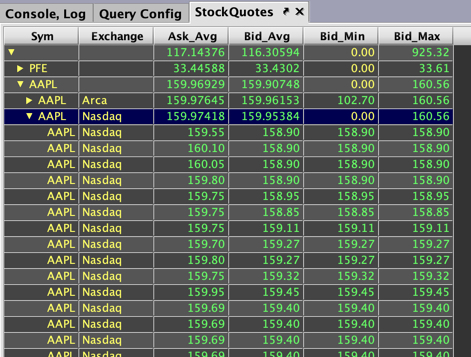
In the screenshot above, the Group By columns are set to Sym and Exchange. So, the Roll-up Table will be grouped first by Sym, then Exchange.
As with any other tables created in Deephaven, the columns in the Roll-up Table can also be sorted, moved, or hidden. AutoFilters applied to columns in the open table in the UI will carry over to the Roll-up Table.
Note: Only Group By columns may be filtered in a Roll-up Table at this time.
Edit Roll-up Parameters
You can edit your Roll-up Table by selecting Edit Roll-up from the right-click table data menu:
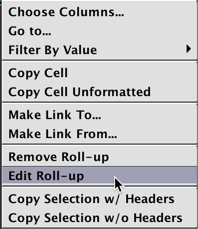
This will open the same dialog window used earlier to create the Roll-up Table. Simply make the required changes to your configuration and select OK.
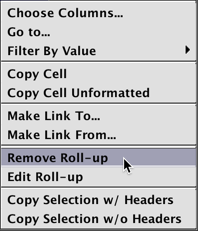
Remove Roll-up from a Table
You can revert to your original table by selecting Remove Roll-up from the right-click table data menu:
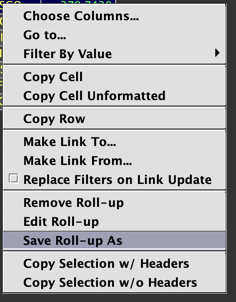
Save Roll-up As
You can save and restore a Roll-up table after it has been removed from the right-click table data menu:
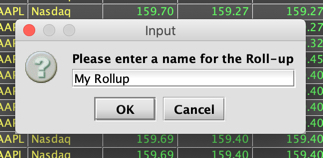
Entering a name and clicking OK will save it to the workspace. After the Roll-up is closed, it can be re applied at any time by clicking the Reapply Roll-Up button in the right click menu:
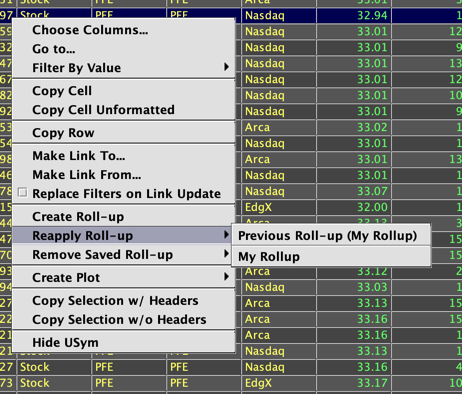
This will reapply your previous Roll-up configuration. However, any sorts or filters applied to the Roll-up table before it was removed will not be restored.
Linking Behaviors
Roll-ups only allow their grouping columns to participate in linking to and from other tables. When operating as a link source rollups will only provide filters for columns that are valid at the level of the clicked row.
In other words, if there are three grouping columns (meaning the table is three layers deep) clicking on a row at the second level will only result in filters from the first two grouping columns:

Clicking on a row in the first level only results in a filter of the first grouping column:

Last Updated: 16 February 2021 18:07 -04:00 UTC Deephaven v.1.20200928 (See other versions)
Deephaven Documentation Copyright 2016-2020 Deephaven Data Labs, LLC All Rights Reserved